If you own a car with a Toyota 2JZ engine—whether it’s a classic MK4 Supra, a JZX100 Chaser, or something else that’s rocking that legendary inline-six—you know how tough and reliable that motor is. But even the 2JZ’s rock-solid build needs regular TLC, and one of the most basic (yet critical) maintenance jobs is swapping out spark plugs. As someone who’s been in the 2JZ parts game for years, I’ve seen DIYers mess this job up so many times: stripping threads, crossing them, or just installing the wrong plugs and wondering why their car’s power’s off or it’s misfiring. Today I’m breaking down this step-by-step, no-BS guide, from the stuff you need to what could go wrong, plus a few pro tips only actual 2JZ suppliers know. TOYOTA 2JZ
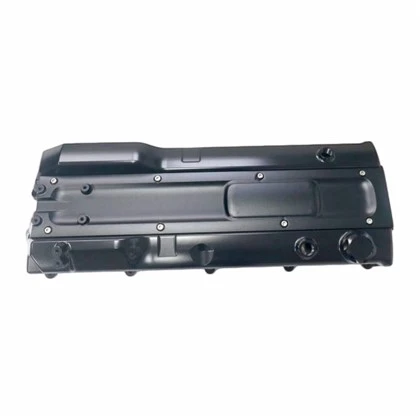
First, let’s talk about why this matters so much for a 2JZ. This engine’s designed to make big power when you tune it, and the spark plugs are the match that lights every combustion cycle. If you go too long without changing them, you’ll get worn electrodes, fouling from carbon buildup, or gaps that are way too big. That kills throttle response, lowers fuel efficiency, and in worst cases, can even damage your ignition coils or catalytic converters. As a supplier, I also see tons of people buy cheap “universal” spark plugs that aren’t built for the 2JZ’s specific heat range—don’t do that. Stick to OEM-spec or proven performance plugs that are made for this motor, okay?
Let’s start with the tools you actually need. No fancy $500 specialty gear, just the basics, plus a couple of things you might not think about. First, a 14mm spark plug socket—make sure it’s rubberized, because if the plug’s stuck in the hole, the rubber will grab it instead of you dropping it into the valve cover. Next, a ratchet and an extension bar (at least 6 inches long, because the 2JZ’s valve covers are tight, especially the rear ones which are hard to reach). You’ll also need a ratcheting wrench or a breaker bar for really stubborn plugs—some 2JZ plugs get seized in there after 100k miles, so don’t risk snapping your ratchet. Don’t skip the torque wrench here—this is non-negotiable. Cross-threading a plug in an aluminum head (the 2JZ has aluminum heads, right) is a disaster, and over-torquing can snap the plug or warp the valve cover gasket. You’ll also need a spark plug gap gauge—new OEM plugs are usually pre-gapped, but if you’re going with performance ones, you gotta check that. Also, a can of carb cleaner or electronic parts cleaner, a clean rag, a small wire brush, and a thread chaser for spark plugs (super important if you accidentally cross-threaded a plug or had a old plug strip a little). Last, make sure you have the right plugs: for stock 2JZ-GE, it’s usually Toyota SK16PR-A8 or equivalent; for the turbo 2JZ-GTE, go with SK20HR11 if you’re stock, or Iridium IX plugs if you’re tuned for more power. As a supplier, we stock both the OEM stuff and high-performance options, so holler if you need help picking what’s right for your build.
Now, prep work—don’t skip this, because the 2JZ’s valve covers are prone to sucking in dirt and grime when you remove the plugs, and that’ll ruin your motor if it gets into the cylinders. First, let your engine cool down completely. If you just shut it off, the valve covers are hot, and touching them can burn you, plus the metal expands and makes plugs way harder to remove. Wait at least 2 hours, or better yet, overnight. Next, pop the hood and locate the ignition coils. On the 2JZ-GTE, there are six coils, one per cylinder, sitting on top of the valve covers. On the GE, same setup, no turbo. Disconnect each coil’s electrical connector first—just press the little tab and pull straight out. Then, remove the 10mm bolts holding each coil in place, and gently lift the coil straight up. Don’t yank it, because the boot might still be stuck on the spark plug. A lot of guys leave the boot on, but as a supplier, I recommend wiping the boot with cleaner and checking it for cracks while you’re in there—cracked boots cause misfires, and they’re cheap to replace. Before you remove any plugs, here’s the biggest pro tip from the 2JZ parts scene: spray every single spark plug hole with parts cleaner and wipe the area around it with a rag. Even if it looks clean, that valve cover accumulates gunk, and if you get dirt in the cylinder when you pull the plug, it’ll scratch the cylinder wall, which leads to blow-by later. Take your time here—no rushing.
Now, removing the old spark plugs. Take your rubberized 14mm socket, attach it to the extension and ratchet, and lower it straight down over the first plug. Turn it counterclockwise slowly. If it’s stuck, don’t force it—use the breaker bar, maybe tap the ratchet a little with a rubber mallet to break the seal. If you snap the plug, that’s a whole other nightmare (I’ve seen it, don’t do it). As you unscrew, keep the socket aligned straight so you don’t cross-thread the plug as it comes out. Once it’s loose, pull it out, and hold it up so any oil or gunk that’s on it doesn’t drip into the hole. Set it aside, and move to the next one. Here, I’d suggest doing one cylinder at a time, not all six. Wait, no—actually, on the rear cylinders of the 2JZ, especially cylinder 6 (the back one on the firewall side), it’s way easier to get to if you do them in order: front row 1,2,3, then back row 4,5,6. Do 1 first, set it aside, then 2, etc. That way you don’t mix up plugs, which is a bad move—each plug is matched to its cylinder’s wear pattern.
Now, prepping the new plugs. Like I said, OEM plugs come pre-gapped, but if you’re using aftermarket ones (or old plugs you regapped, though I don’t recommend that), grab your gap gauge. The correct gap for a stock 2JZ is 1.0-1.1mm (0.039-0.043 inches). For tuned turbo builds, you might go up to 1.1mm, but never more than that—too big a gap and the spark won’t ignite the fuel-air mix properly. If you need to adjust the gap, gently bend the outer electrode with the gap tool, don’t hammer it, because that’ll crack the insulator. Once the gap is right, put a tiny bit of anti-seize on the threads of the new plug. Wait, hold on—don’t go crazy with anti-seize. A thin coat, only on the threads, not the electrode or the gasket on the bottom. Too much anti-seize can make the plug over-torque, which is bad. Also, never use anti-seize on copper plugs, only iridium or platinum ones—copper doesn’t need it. As a supplier, we can tell you which plugs take anti-seize, so hit us up if you’re not sure.
Installing the new plugs is where most guys mess up. First, thread the plug into the hole by hand. No ratchet, no socket—start it with your fingers. Align the plug straight with the hole, and turn it clockwise until you feel it catch the threads. If it’s not turning easily, it’s cross-threaded. Don’t force it—pull it out, check the threads, maybe use the thread chaser I mentioned earlier, and try again. Cross-threading is the number one mistake here, and it’s way easier to avoid by hand-threading first. Once the plug’s hand-tight, grab your torque wrench. The correct torque for a 2JZ spark plug is 27 Nm (20 lb-ft). Don’t go by feel alone—everybody’s “hand tight” is different, and aluminum heads don’t forgive over-torquing. Set your torque wrench to 27 Nm, and tighten the plug until it clicks. That’s it, no more. If you don’t have a torque wrench, a rough guide is to tighten it 1/8 turn after the gasket seats, but only if you’ve never removed that plug before. If it’s a used plug, that’s a bad idea—use a torque wrench.
Now, putting it all back together. Once all six plugs are in, grab your ignition coils. First, double-check that each coil boot is clean and crack-free. Set the coil on top of the plug, align it straight, and push down firmly until it clicks into place. Don’t skip the click—if it’s not seated, you’ll get a misfire. Tighten the 10mm bolts holding the coil to the valve cover, and don’t over-tighten those either—just until snug, maybe 8 Nm. Then plug in the electrical connector on each coil, make sure it’s clicked in. Now, do a final check: all coils are seated, all bolts are tight, no leftover tools around the valve covers. Wipe off any parts cleaner you spilled, close the hood.
Wait, before you fire it up, a quick double-check from the supplier playbook: take a look at the old plugs when you pull them out. If they’re white, you’re running lean—needs a fuel pressure check. If they’re black and covered in oil, your valve seals or piston rings are going bad. If the center electrode is worn down, you waited too long to change them. That quick visual tells you if there’s a bigger issue than just plug wear, which saves you from breaking down later.
Now, firing it up. Crank the engine, and listen for misfires. If it runs rough, pop the hood immediately. Check if a coil is loose, if a connector fell off, or if a plug is slightly loose. If it idles smooth, take it for a 10-minute drive around the block, then check the plugs again when you get back—they should have a light brown or tan color, which is perfect. If they’re anything else, go back and adjust gaps or check for fuel issues.
A few pro tips I’ve picked up working with 2JZ engines for years: First, change plugs every 60k miles for stock 2JZs, every 40k if you’re turbocharged or tuned. Second, if you’re removing rear plugs, you might need a swivel socket—extension bars work, but a swivel makes it way easier to angle the socket straight into the back row holes. Third, don’t use a air compressor to blow out spark plug holes—air compressors can shoot dirt deep into the cylinder, even if you think you’re holding it right. Stick to the parts cleaner and rag I mentioned. Fourth, if you do accidentally cross-thread a plug, don’t just ignore it—run a spark plug thread chaser through the hole before installing the new plug. We sell thread chasers specifically for 2JZ heads, so don’t buy a cheap universal one that won’t fit the 14mm hole.
And a quick note from the parts side: we stock every single part you’ll need for this job, from OEM spark plugs to high-performance iridium ones, ignition coils, boots, even torque wrenches if you don’t have one. If you’re not sure what plugs are right for your 2JZ build, shoot us a message to chat through it—we work with 2JZ owners every day, from stock daily drivers to 1000hp drag cars, so we can help you pick the exact parts that’ll make your swap go right.

Don’t cut corners here—this is one of the cheapest, easiest maintenance jobs you can do for your 2JZ, and it pays off in better power, better fuel economy, and fewer breakdowns down the line. Skip the cheap tools, skip the wrong parts, and take your time. If you need any parts or have questions about your specific 2JZ model, hit us up to talk through the details.
Mitsubishi Engine Parts References
- Toyota Motor Corporation. (1998). Service Manual: Supra JZA80, JZX100 (2JZ-GTE, 2JZ-GE). Toyota Technical Publications.
- Engine Builder Magazine. (2021). Common Spark Plug Installation Mistakes and How to Avoid Them. Engine Builder Media.
- 2JZ Performance Forum. (2023). Recommended Spark Plugs for Stock vs. Tuned 2JZ Engines. Community Technical Guide.
- AAA. (2022). Basic Automotive Maintenance: Spark Plug Replacement. AAA Auto Repair Guides.
RCH Precision Machinery Co., Ltd.
With abundant experience, we are one of the most professional toyota 2jz manufacturers and suppliers in China. We warmly welcome you to buy high quality toyota 2jz at competitive price from our factory. If you have any enquiry about cooperation, please feel free to email us.
Address: No.71 Zhennan 3 road Tong’an Area Xiamen, Fujian, China
E-mail: mike@rchxm.com
WebSite: https://www.rchxm.com/
