If you’ve ever wandered into a local craft brewery, pressed your nose against the glass at the brewing section, and wondered “how do they actually turn grain into that hazy IPA I’m sipping?” — you’re not alone. When I first started working in the craft brewing equipment supply space, I assumed it was just a bunch of guys stirring big pots and calling it art. Spoiler: it’s equal parts science, patience, and knowing how to use the right gear. As someone who’s spent the last 8 years helping small breweries (and homebrewers making the jump to commercial systems) set up their lines, I’ve seen first-hand how cutting corners on equipment can turn a perfectly good grain bill into a watery mess. Let’s break down the real, messy, actionable brewing process with craft brewing gear, no stuffy jargon required. Craft Brewing Equipment
First, let’s start with the very base: grist, or milled grain. You can’t brew anything without grain, right? But the way you mill it matters way more than most people realize. Craft brewing equipment suppliers will tell you this again and again, but it’s not just about turning wheat or barley into powder. If you mill it too fine, you get a stuck sparge — that’s when water can’t move through the grain bed to pull out the sugars, and you’re stuck with a pot of useless mush. If you mill it too coarse, you lose too much sugar in the grain husks, ending up with a low-gravity beer that tastes like bread water. Most of the commercial systems we sell come with adjustable roller mills, so brewers can dial the gap to match their brew house size. I once had a new client who tried to skip the expensive (but worth it) mill we recommended and use a off-the-shelf grain mill for their first batch. They ended up with a 2-hour sparge that barely got any sugars, and had to dump 15 gallons of wort (that’s the sugary liquid you get from mashing) and start over. Moral of the story: mill your grain right, and the rest of the process goes 10x smoother.
Next up is mashing, which is where all the sugar gets unlocked. Here’s the science simplified: barley has enzymes that turn starch into sugar, and those enzymes only work at specific temperatures. The mash tun — one of the core pieces of craft brewing equipment we supply — is where this happens. You mix your milled grist with hot water (usually around 150-158°F, depending on the beer style) in the mash tun, and let it sit for 60-90 minutes. That’s when amylase enzymes kick in, breaking down starch into maltose and glucose — the sugars yeast will later eat.
Pro tip from the trenches: don’t neglect the mash tun’s temperature control. A lot of cheap setups have no way to hold a steady temp, so one batch might be 150°F, the next 160°F, and your beer will taste inconsistent. The mash tuns we sell have precision temperature gauges and jacketed walls, so brewers can lock in that 154°F for a malty amber, or bump it to 158°F for a drier, crisper IPA. I’ve seen brewers get so excited about new hop varieties they forget to check their mash temp, and end up with a beer that’s either too sweet or too flat. Mashing is the foundation — skip the precision here, and your end product will suffer.
Once the mash is done, it’s time to lautering and sparging. Lautering is the act of separating the sugary wort from the spent grain, and sparging is rinsing the grain with more hot water to get every last drop of sugar out. This happens in the mash tun if it’s a combination mash/lauter tun, or a separate lauter tun if you’re using a more advanced system. The key here is the grain bed — it acts like a natural filter, keeping all the grain bits out of your wort. Again, that mill we talked about earlier matters: a consistent crush gives you a stable grain bed that doesn’t collapse, so water flows evenly.
Here’s where a lot of new brewers mess up: sparging too hot, or too fast. If the water’s over 170°F, you’ll pull out tannins from the grain husks, which make your beer taste like burnt cardboard. If you pour it too fast, you agitate the grain bed and get grain particles in your wort — that leads to cloudy beer (not the good kind of hazy IPA, the kind that’s just unfiltered sludge). The craft brewing equipment we supply includes sparge arms that spray water evenly over the grain bed, so you don’t have to hover with a hose and risk messing it up. One of our regular clients uses our automated sparge system and told me it cut their brew day time by 2 hours, and their sugar yield went up 15% — that’s a huge difference in cost and flavor.
Once you’ve got your full wort, it’s time to boil it. This happens in a brew kettle, another non-negotiable piece of craft brewing equipment. The boil serves a bunch of purposes: it sterilizes the wort (kills any unwanted bacteria that would spoil your beer), concentrates the sugars, and of course, adds hops at specific times for flavor and aroma. Let’s break down the hop schedule, because that’s what defines a lot of craft beer. You add some hops at the start of the boil (60 minutes out) for bitterness — the long boil extracts alpha acids from hops that give beer that signature bitter edge. Then you add hops 15-20 minutes out for flavor, and just 1-5 minutes before the end for aroma, which is where that juicy, piney, citrusy smell comes from.
A lot of homebrewers who move to commercial systems underestimate how much steam a commercial boil produces. If your brew kettle doesn’t have a proper vent and heat control, you’ll end up with wort all over your brewery, and worse, a boil-over that wastes a whole batch. The brew kettles we supply have adjustable burners (gas or electric, depending on your setup) and heavy-duty venting, so brewers can get a rolling boil without the mess. I once had a client who tried to use a standard stock pot for their first commercial batch — huge mistake. They had a boil-over that shut down their whole brewery for 3 hours, and they lost a $2,000 batch of wort. Don’t be that guy.
After the boil comes whirlpooling. This is a step a lot of new brewers skip, but it’s game-changing for clarity. When you stop heating the wort and stir it in a circular motion, all the hop particles and sediment (called trub) get pulled to the center of the kettle, so you can drain the clear wort off the top without getting any gunk in your fermenter. This is where craft brewing equipment that’s designed for commercial use shines — our kettles have built-in whirlpool ports or easy-to-use stirring systems, so brewers don’t have to do it manually, which is tiring and inconsistent. I’ve had brewers tell me adding a proper whirlpool step made their beer way less bitter and way more smooth, because they eliminated all that harsh trub from their final product.
Now we’re at the home stretch: fermentation. This is where the magic really happens, and it’s all about the fermenter. Once you cool the wort down to yeast temperature (usually 65-75°F for ale, 50-55°F for lager, depending on the yeast strain), you transfer it to a fermenter and pitch your yeast. The yeast eats the sugars, turns them into alcohol and CO2, and produces all the flavor compounds that make each beer unique — that banana ester in a hefeweizen, the citrus notes in an IPA, the clean crispness of a lager.
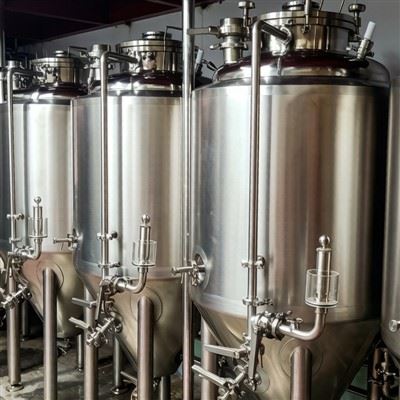
Here’s the thing about fermenters: not all are created equal. A lot of cheap fermenters have poor temperature control, which can make yeast act wonky — leading to off-flavors or stuck fermentation (when yeast stops eating sugar before it’s done). The fermenters we supply are jacketed, so you can circulate hot or cold water to keep a steady temp, even if your brewery’s ambient temp fluctuates. They also have sanitary valves that make transferring beer easy and reduce the risk of contamination, which is huge because one batch of contaminated beer can ruin an entire week’s work. I had a client a few years back who used a cheap bucket fermenter with no airlock, and they ended up with a wild yeast infection that made their entire IPA taste like vinegar. They lost 5 barrels, and had to close for a week to clean everything. Proper craft brewing equipment isn’t a luxury — it’s a safeguard.
After fermentation comes conditioning. This is the part where the beer gets smooth, and any off-flavors mellow out. A lot of people think fermentation is done when the yeast stops working, but conditioning is just as important. For ales, that’s usually 1-2 weeks at cool temps, and for lagers, it’s 4-6 weeks at cold temps (that’s why lagers take so much longer to brew). Some brewers also do dry hopping here — adding extra hops after fermentation to get that super juicy aroma that’s popular right now. The fermenters we sell have space for dry hopping, or separate bright tanks (used for conditioning and packaging) that are perfect for that step. One of our clients makes a hazy IPA that’s known for its super bright hop aroma, and they told me using our bright tanks for dry hopping cut their conditioning time by a week, because the hops infuse evenly without any sediment ruining the flavor.
Finally, it’s time for packaging — either cans, bottles, or kegs. This is where the finished beer gets carbonated, then put into something you can take home. Carbonation happens either by adding CO2 to the fermented beer, or letting the yeast naturally carbonate it in the package (that’s called bottle conditioning, and it’s common for traditional ales). The packaging line is the last piece of the craft brewing equipment puzzle, and it has to be sanitary — if you contaminate the beer at this step, all the work up to this point is wasted. The lines we supply are fully stainless steel, easy to clean, and have sanitary fittings that meet industry standards, so brewers can package their beer without worrying about spoilage.
Now, I know all this sounds like a lot, but that’s the thing about craft brewing: it’s not just following a recipe, it’s understanding how each piece of equipment impacts the final product. A lot of new brewers try to cut costs on equipment to get their brewery up fast, but they end up spending more money fixing mistakes, dumping bad batches, or redoing processes. The right craft brewing equipment doesn’t just make brewing easier — it makes your beer more consistent, which is how you build a loyal customer base.
If you’re a homebrewer ready to go commercial, or a brewery looking to upgrade your system, I get it — the process can feel overwhelming. But you don’t have to figure it out alone. We’ve helped hundreds of brewers, from 1-barrel nano breweries to 30-barrel production lines, get set up with gear that fits their needs and budget. We don’t just sell equipment — we help you design a brew house that works for your style of beer, whether you’re into hazy IPAs, sours, lagers, or anything in between.
If you’re ready to talk through your setup, or have questions about any part of the brewing process, hit us up to chat through the details.
Scale Beer Equipment References:
- Stewart, G. G., & Russell, I. (2019). Brewing Science: A Multidisciplinary Approach. Taylor & Francis.
- De Rouck, G., & Jaskula, B. (2017). Handbook of Brewing Equipment. Woodhead Publishing.
- Narziss, L., & Back, W. (2018). Technology of Brewing: An Introduction. VLB Berlin.
- Priest, F. G., & Stewart, G. G. (2006). Handbook of Fermented Functional Foods. CRC Press.
Wenzhou Jinggong Machinery Equipment Co., Ltd.
We are one of the most professional craft brewing equipment manufacturers and suppliers in China. With abundant experience, we warmly welcome you to buy customized craft brewing equipment at competitive price from our factory. If you have any enquiry about quotation, please feel free to email us.
Address: No.Jiadi Industrial Zone, Yaoxi Town, Longwan District, Wenzhou City, China.
E-mail: jinggong2026@163.com
WebSite: https://www.jg-ind.com/
